Sometimes when you are trying to solve a problem the model is just too big to figure out where the problem lies. You may know the subsystem where it occurs, but the problem is, how do you test that subsystem apart from the whole?
Test harnesses!
Starting around 2015, Simulink provided a methodology for doing this (e.g., creating test harnesses from an atomic unit within the full model).
Set up the inputs and outputs to the subsystem under “test” for logging.
Simulate the full model through one of the scenarios that causes the issue.
Use the logged data as inputs to the test harness.
Dig deeper!
The logged data provides the baseline for your exploration; e.g., it provides a basic valid set of inputs. The objective now is to vary those inputs to determine the root cause of your error, and once that is accomplished to validate your solution. (Note: This image shows that getting to the root is to keep the “tree” alive)
Save the test
A pass/fail criteria should be defined for the test harness. While the test harness may have been created as part of a debugging exercise, it should be saved as part of the regression testing suite.
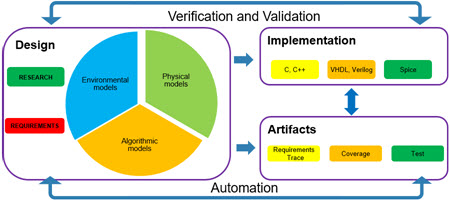
With this post I’m going to walk through a sample project demonstrating how Units in Simulink Models can be validated. Demonstrating each stage of the project development, providing insight into how and what I was thinking at each step along the way.
Stages of project development
There are 5 stages to project development
Identification of need: What is the problem you are trying to solve?
Review of existing solutions: Is there an existing solution that meets needs?
Task identification/estimation: What are the tasks / steps that need to be completed and what is the effort (risk) to complete them?
Implementation and testing: Following a ‘test as you go’ strategy develop the modules that you need
Validation of solution: Does what you did in 4 solve what you needed in 1?
This is what stage “5” feels like if done well
Stage 1: Identification of need
As of release 2019A Simulink provides
Unit specification at the boundaries and through Simulink.Signal and Simulink.Parameter objects
Unit checking at the boundaries of models (inports and outports)
While this is very useful (and you should always define your boundary conditions) for large models knowing what the units of interior signals would be beneficial.
Problem to be solved: determine the unit of all blocks internal to the model and use that information to validate the units at the boundaries / internal to the model.
Unit checking at the Subsystem Boundary
What I wanted to be able to do was specify the unit types on the inports and outports and propagate the units through the model.
At this stage, depending on the complexity of the project, the high level requirements should be written; derived requirements will be written at the start of task 3.
Stage 2: Review of existing solutions
There are two classes of “existing solutions”. The first are solutions to “base” problem you are trying to solve; the second are solutions to the sub-tasks in the problem. In this instance we have already identified the extent of the solution to the “base” problem, the ability to check units at the boundaries of the model; for what we want this is insufficient.
Examples of “Sub-Tasks”
For the sub-tasks the Simulink API’s provide the interface required to “decode” the model to propagate the information through the model.
Stage 3: Task identification/estimation
Depending on the size of the project task identification can be decomposed to a “function” based level or lower. For large projects the “function” may in fact be a collection of functions. As you start to identify the functions required reuse of the components should be taken into account. My first pass (almost always on paper) is in a “operation required / issues” format.
Propagate unit information in the model:
How to determine data/unit flow
How to handle data merging blocks (buses and mux blocks)
Having identified the tasks I now think about what goes into each step and if I have experience or near experience in coding it; in this case all of the tasks involved are close to things I have done before so I have faith in my estimates…. (For the record, I estimated 8 hours and it ended up taking me 7)
Step 4: Implementation and Testing
Step 4.1: Unit propagation
My first question was how to propagate the units through the model. I decided that a first, reasonable requirement was that all of the inports must have units defined. If I enforced that I could simple “walk forward” from the inports to the outport of the system.
The once that approach was selected it the implementation becomes clear; create an array of inports and trace outwards from them. As each new block is found tack it onto the end of the array removing the most recent from the list.
(Note: Since this is a demo project I am not, currently, doing anything with Mux or Bus blocks).
Step 4.2: Calculating units
The key to calculating the units is to realize that there are really only 3 fundmental operations.
Cancellation: through either multiplication or division units are canceled.
Matching: the operation (addition or subtraction) requires the input units to match
Integration / derivation: a “cancellation” of time.
As you look at the code you will see that I have created “num” and “den” variables, these are for the numerator and denominators of the inputs. Additional, for the sake of a demo, I have restricted the number of block inputs to 2.
Notes:
In hindsight I didn’t actually need to find the numerator and denominator since much of what happens is through string clean up. However, conceptually, it was a required task).
In this example I am not handling feedback loops through unit delays, however they could be treated as a special case of a “sum” or matching required block.
As I developed the code I also wrote some basic test points to validate that the behavior was correct. The most basic tests were to determine if the units, stored as strings by Simulink, could be converted to the num/den strings
In this case you can see that I tried to cover all of the ways in which data could be encoded. One thing to note, I did not implement “compound units”. E.g. if you put in N (for Newtons) I do not cancel that in the same way you would kg*m/s^2. To do that I would, I think, first expand all the compound units to their fundamental components and then cancel.
Cancellation at the root
The final step in this process will be to validate the units at the outports. To indicate passing / failing outports I color code them “green” for pass and “red” for failed.
Step 5: Validation of the solution
The code, as implemented, provides a “taste” of the final solution. However, the way in which it was code is modular so as I want to add in new capabilities (support for additional blocks, muxs, buses, subsystems) the extensions will be easy to add. If you are interested I have included a copy of the code and sample model here.